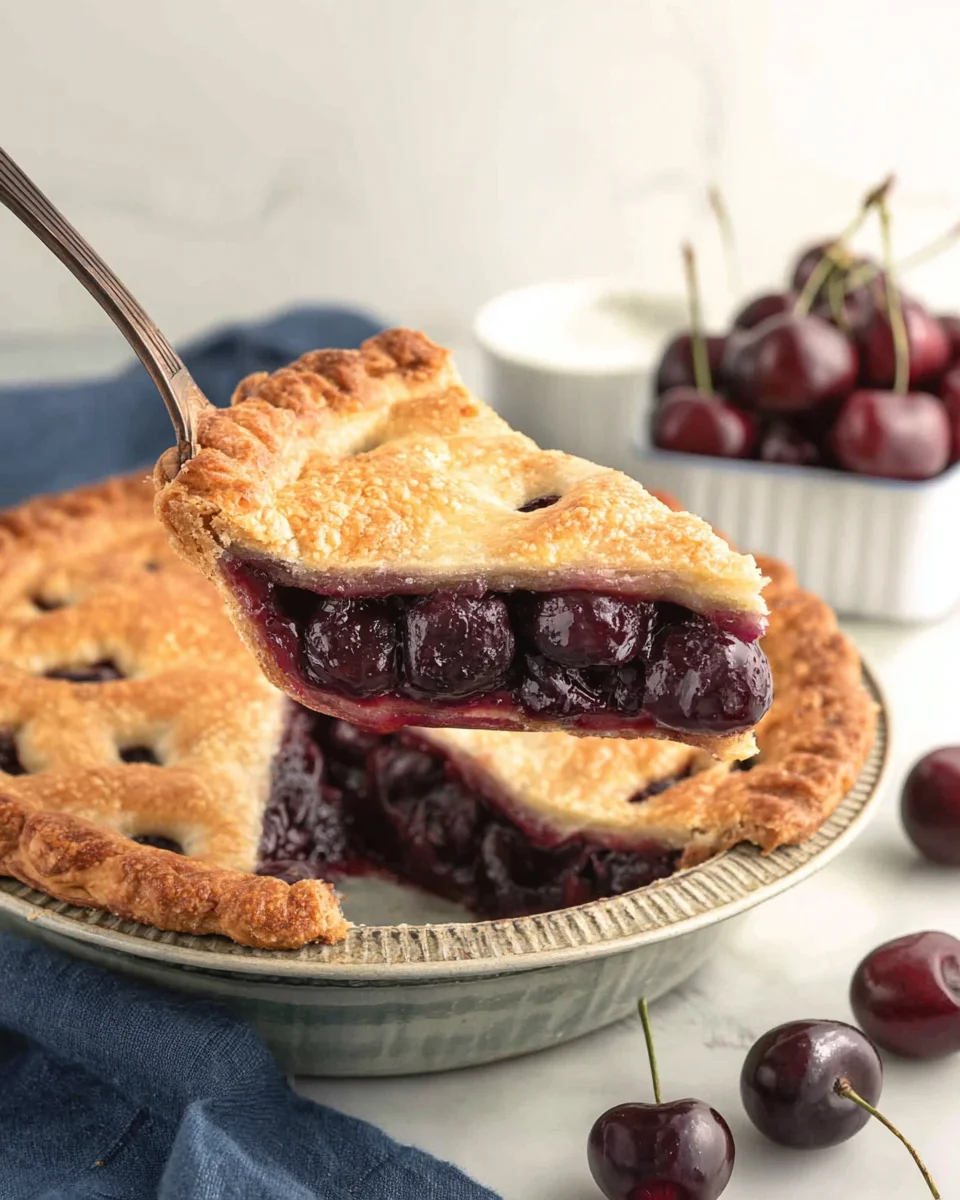
Fresh Cherry Pie
Fresh Cherry Pie is a delightful summer dessert that showcases the vibrant flavor of fresh cherries in every bite. This classic dish features a flaky double crust and is perfect for picnics, family gatherings, or any occasion that calls for a sweet treat. With its visually stunning presentation and irresistible taste, this cherry pie will surely impress your guests and satisfy your cravings.
Why You’ll Love This Fresh Cherry Pie
This fresh cherry pie stands out for many reasons.
- Delicious Flavor: The combination of sweet cherries and a hint of lemon creates a refreshing taste that is truly addictive.
- Versatile Dessert: Perfect for summer BBQs, holidays, or simply as a weekend treat, this pie fits any occasion.
- Homemade Goodness: Making this pie from scratch allows you to control the ingredients and create a wholesome dessert your family will love.
- Impressive Presentation: A beautifully baked pie not only tastes great but looks stunning on any table.
- Easy to Follow Recipe: With straightforward instructions, even novice bakers can create this delightful dessert with confidence.
Tools and Preparation
Before diving into the baking process, it’s essential to gather your tools and prepare your workspace.
Essential Tools and Equipment
- 9-inch pie plate
- Pastry blender or two knives
- Rolling pin
- Saucepan
- Whisk
- Mixing bowls
Importance of Each Tool
- Pie Plate: A good-quality pie plate ensures even baking for a perfectly cooked crust.
- Pastry Blender: This tool helps achieve that flaky texture in the dough by cutting butter into flour effectively.
- Rolling Pin: Essential for rolling out the dough to the right thickness for your crusts.
Ingredients
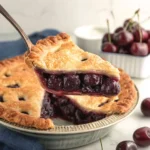
A stunning double-crusted cherry pie using fresh cherries for a show-stopping summer dessert!
For the Cherry Filling
- 6 cups fresh cherries, pitted
- 1 tablespoon fresh lemon juice
- 1/2 teaspoon vanilla extract
- 3/4 cup granulated sugar
- 1/4 cup cornstarch
- pinch of salt
For the Pie Crust
- 2 and 1/2 cups all-purpose flour
- 1/2 cup granulated sugar
- 1 cup (2 sticks) unsalted butter, cold & cubed
- 1/4 cup cold water
For Egg Wash
- 1 large egg
- 1 tablespoon water
- 1 tablespoon granulated sugar
How to Make Fresh Cherry Pie
Step 1: Prepare the Cherry Filling
In a saucepan over medium heat, add the pitted cherries, lemon juice, vanilla extract, granulated sugar, cornstarch, and salt.
* Bring to a simmer before reducing heat to low.
* Let it simmer for about 10 minutes until thickened while stirring frequently.
* Remove from heat and let cool.
Step 2: Preheat the Oven
Preheat your oven to 425°F. Generously butter a 9-inch pie plate and set it aside.
Step 3: Make the Pie Dough
In a large bowl, whisk together the flour and sugar.
* Cut in the cold butter using a pastry blender or two knives until crumbly.
* Add cold water and knead with your hands until well combined.
* Divide the dough into two equal balls.
Step 4: Chill the Dough
Flatten each ball of dough slightly and wrap with plastic wrap.
Place in the refrigerator for 30 minutes.
Step 5: Roll Out the Dough
Remove the dough from the refrigerator.
On a lightly floured surface:
* Roll each ball into a disc about 1-inch larger than your pie plate.
Check size by inverting the pie plate over each rolled-out disc to ensure proper fit.
Step 6: Transfer Dough to Pie Plate
Gently roll one disc around your rolling pin, then place it on one side of the pie plate.
Press down gently to fit it into place while letting excess hang over.
Step 7: Fill with Cherry Mixture
Fill your prepared crust with cooled cherry filling evenly spread across.
Step 8: Top Crust Preparation
Roll out the second ball of dough to match size.
Place it over filled pie:
– Trim excess dough around edges.
– Decorate edges as desired (flute or pinch).
– Cut six small slits in circle pattern on top crust for steam release.
Step 9: Apply Egg Wash
In a small bowl, whisk together egg and water. Brush this mixture over top crust and edges.
Sprinkle with granulated sugar for extra sweetness.
Step 10: Bake
Place pie on a rimmed baking sheet. Bake for 30 minutes:
– Rotate after 15 minutes.
– Cover edges with foil if browning too quickly.
Continue baking until golden brown and bubbling—about another 30 minutes.
Step 11: Cool Before Serving
Remove from oven; take off foil around edges. Let cool on wire rack for at least 2 hours before slicing into pieces. Enjoy your delicious Fresh Cherry Pie!
How to Serve Fresh Cherry Pie
Fresh Cherry Pie is a delightful summer dessert that can be enjoyed in various ways. Whether you prefer it warm or cold, serving it with a few simple additions can elevate the experience.
À La Mode
- Ice Cream: A scoop of vanilla ice cream adds creaminess and balances the tartness of the cherries.
With Whipped Cream
- Homemade Whipped Cream: Top your slice with freshly whipped cream for a light and airy finish.
Pair with Coffee
- Brewed Coffee: A cup of hot coffee complements the sweetness of the pie, making for a lovely afternoon treat.
Serve with Yogurt
- Greek Yogurt: For a healthier option, dollop some Greek yogurt on top. The tanginess pairs well with the sweet cherries.
Add Nuts
- Chopped Nuts: Sprinkle some toasted almonds or walnuts for added crunch and flavor contrast.
Create Mini Pies
- Individual Servings: Use mini pie crusts to create individual fresh cherry pies, making them perfect for gatherings or parties.
How to Perfect Fresh Cherry Pie
Creating the perfect Fresh Cherry Pie requires attention to detail and a few key tips to ensure your dessert turns out beautifully.
-
Use Fresh Cherries: Always choose ripe, fresh cherries for the best flavor. Frozen cherries can release too much moisture.
-
Balance Sugar and Tartness: Adjust sugar based on the sweetness of your cherries. Taste before adding all the sugar.
-
Chill Your Dough: Keep your pie crust ingredients cold to ensure a flaky texture. Chill dough before rolling it out.
-
Don’t Skip the Venting: Make sure to cut slits in the top crust. This allows steam to escape and prevents a soggy bottom.
Best Side Dishes for Fresh Cherry Pie
Pairing side dishes with your Fresh Cherry Pie can enhance your meal’s overall appeal. Here are some great options:
- Cheese Platter: A selection of cheeses provides a savory contrast to the sweet pie.
- Fruit Salad: A refreshing fruit salad can lighten up the meal and add seasonal fruits alongside cherries.
- Salad Greens: A light green salad dressed in vinaigrette offers a crisp and refreshing balance.
- Grilled Peaches: Sweet grilled peaches bring out natural flavors and complement cherry nicely.
- Sliced Melon: Serve chilled melon slices for a juicy side that cleanses the palate.
- Pecan Crust Cookies: These cookies provide an additional crunchy texture that pairs well with cherry filling.
- Chocolate Tartlets: Rich chocolate tartlets could be an indulgent option for chocolate lovers at your gathering.
Common Mistakes to Avoid
Making a Fresh Cherry Pie can be a delightful experience, but there are common pitfalls to watch out for.
- Skipping pitting the cherries: Always ensure your cherries are pitted before cooking. This avoids unpleasant surprises and enhances flavor.
- Using warm butter: For a flaky pie crust, use cold butter. Warm butter can lead to a tough crust instead of the desired flakiness.
- Not letting the filling cool: Filling your pie with hot cherry mixture can cause the crust to become soggy. Allow it to cool completely before assembly.
- Overworking the dough: Handle the dough as little as possible. Overworking can create a dense crust rather than a light and flaky one.
- Ignoring bake times: Keep an eye on your pie while baking. Different ovens can vary, so adjust bake times as needed for perfect results.
Storage & Reheating Instructions
Refrigerator Storage
- Store leftover pie in an airtight container.
- It lasts in the fridge for up to 3 days.
Freezing Instructions
- Wrap the pie tightly in plastic wrap or aluminum foil.
- Freeze for up to 3 months for best quality.
Reheating Instructions
- Oven: Preheat to 350°F and heat for about 15-20 minutes until warm.
- Microwave: Use medium power and heat slices for about 30 seconds at a time until warm.
- Stovetop: Place slices in a skillet over medium heat, cover, and warm for about 5 minutes.
Frequently Asked Questions
Here are some common queries regarding making Fresh Cherry Pie.
Can I use frozen cherries for Fresh Cherry Pie?
Yes, you can use frozen cherries. Just make sure to thaw and drain them well before using them in your pie filling.
How do I make my Fresh Cherry Pie filling thicker?
To thicken your filling, increase the amount of cornstarch or add some additional sugar during cooking. It helps absorb excess liquid.
What type of cherries are best for Fresh Cherry Pie?
Sweet cherries like Bing or Rainier are ideal due to their rich flavor and sweetness. Tart cherries also work well if you prefer a more tangy taste.
Can I customize my Fresh Cherry Pie recipe?
Absolutely! Feel free to add spices like cinnamon or nutmeg, or mix in other fruits like blueberries or raspberries for added flavor.
How do I know when my Fresh Cherry Pie is done baking?
Your pie is ready when the crust is golden brown and the cherry filling is bubbling through the slits on top.
Final Thoughts
This Fresh Cherry Pie is not only delicious but also versatile, making it perfect for summer gatherings or cozy family dinners. You can customize it with different spices or fruit combinations. Try this recipe and enjoy a delightful slice of summer!
Fresh Cherry Pie
- Total Time: 1 hour 30 minutes
- Yield: Serves 8
Description
Fresh Cherry Pie is a quintessential summer dessert that bursts with the flavor of ripe, juicy cherries nestled in a flaky, homemade crust. This classic recipe is perfect for family gatherings, picnics, or simply satisfying your sweet tooth. With its vibrant color and irresistible taste, this pie will captivate your guests and make any occasion special. Easy to prepare, even novice bakers can create this delightful treat with confidence. Serve it warm with a scoop of vanilla ice cream or topped with freshly whipped cream for an unforgettable dessert experience.
Ingredients
- 6 cups fresh cherries, pitted
- 1 tablespoon fresh lemon juice
- 1/2 teaspoon vanilla extract
- 3/4 cup granulated sugar
- 1/4 cup cornstarch
- 2 and 1/2 cups all-purpose flour
- 1 cup unsalted butter, cold & cubed
- 1/4 cup cold water
Instructions
- Prepare the cherry filling by combining pitted cherries, lemon juice, vanilla extract, sugar, cornstarch, and salt in a saucepan over medium heat. Simmer for about 10 minutes until thickened. Let cool.
- Preheat the oven to 425°F and generously butter a 9-inch pie plate.
- In a bowl, mix flour and sugar. Cut in cold butter until crumbly. Add cold water and knead gently until combined; divide into two balls and chill for 30 minutes.
- Roll out each dough ball into discs larger than the pie plate. Fit one disc into the plate and fill with cooled cherry mixture.
- Top with the second disc, seal edges, add slits for steam release, then brush with egg wash and sprinkle sugar.
- Bake on a rimmed sheet for about 30 minutes until golden brown and bubbling.
- Prep Time: 30 minutes
- Cook Time: 60 minutes
- Category: Dessert
- Method: Baking
- Cuisine: American
Nutrition
- Serving Size: 1 slice (100g)
- Calories: 300
- Sugar: 20g
- Sodium: 150mg
- Fat: 15g
- Saturated Fat: 9g
- Unsaturated Fat: 5g
- Trans Fat: 0g
- Carbohydrates: 40g
- Fiber: 2g
- Protein: 3g
- Cholesterol: 30mg